Deploy R Shiny Applications on Heroku
R Shiny applications provide a quick and efficient font-end interface for R applications. There are a number of options available for deploying and sharing Shiny applications including setting up your own Shiny Server or using Shinyapps.io. One of the best and often overlooked options available for deploying Shiny applications is Heroku. The free tier offers git and docker deployments, custom domains, and plenty of run-time hours for applications that don’t need to be run 24/7. This guide will provide a step by step process for deploying your own Shiny applications on Heroku via GitHub.
Setup a GitHub Repository
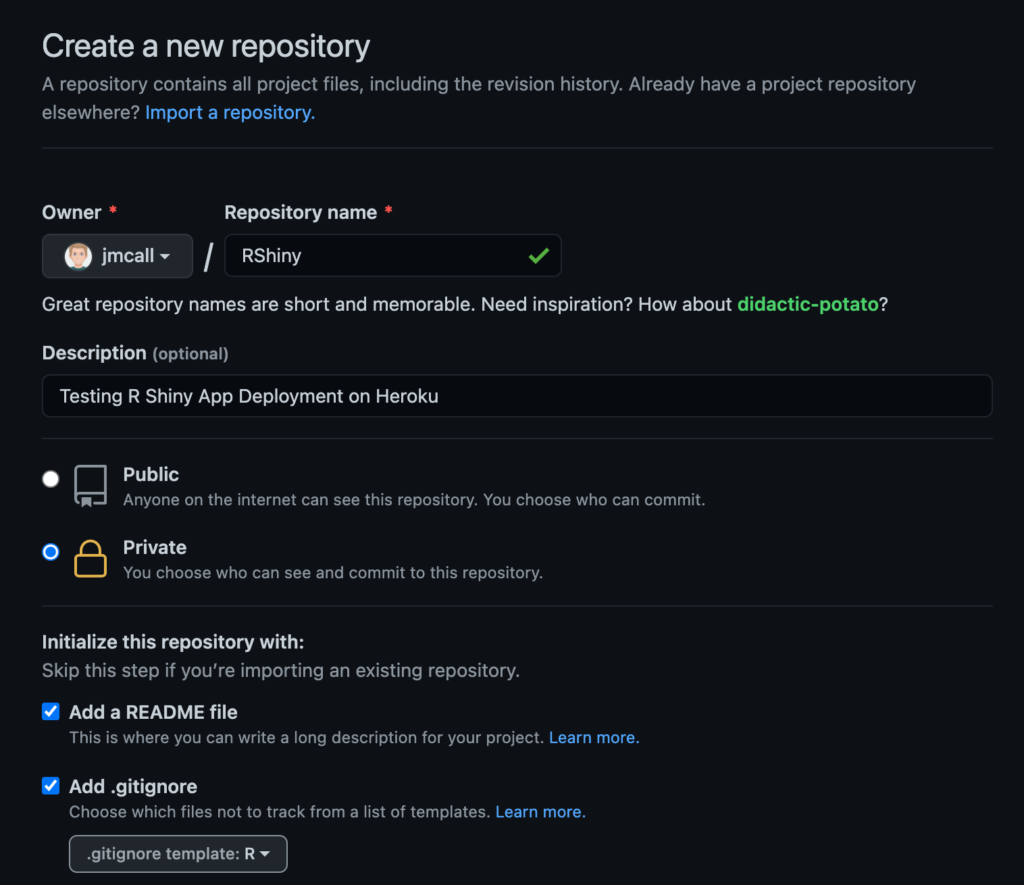
The first step is to setup a GitHub repository, login to your GitHub account and click New. Enter a repository Name, Description, select either Public or Private and check Add a Readme and Add .gitignore file then click Create Repository.
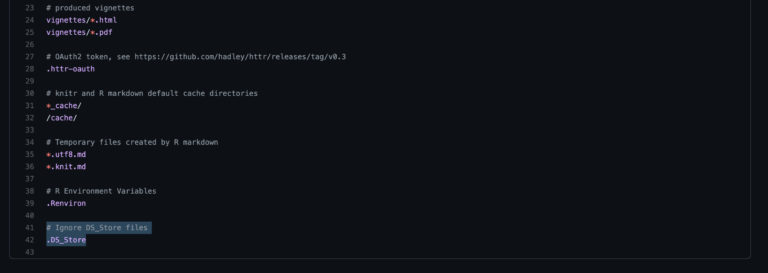
Optional step: in the .gitignore file we can add code so GitHub will ignore .DS_Store files that Mac OS X generates automatically in the background to save characteristics of folders. These files can get cumbersome to deal with and can clutter our GitHub repository so it is recommended to add the following code to the .gitignore file:
# Ignore DS_Store files

.DS_Store
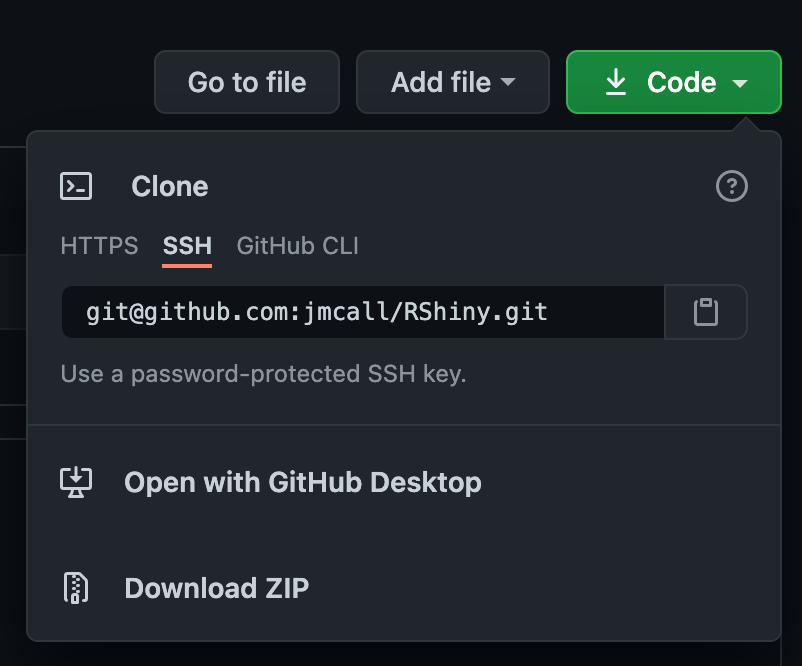
Once you are at the repository main branch page click Code and copy the repository address. In this example we will be using SSH but HTTPS will also work, copy whichever method you are using. For more information on setting up GitHub SSH you can read a step-by-step guide here or read the GitHub documentation here.
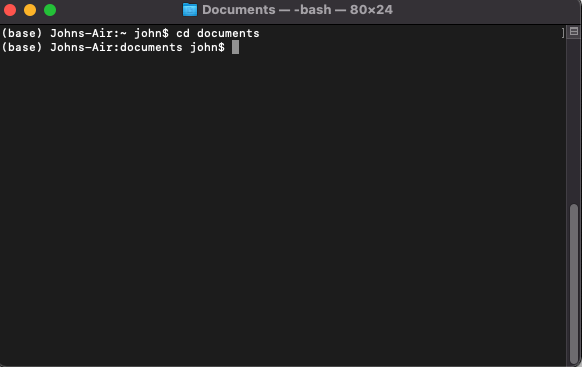
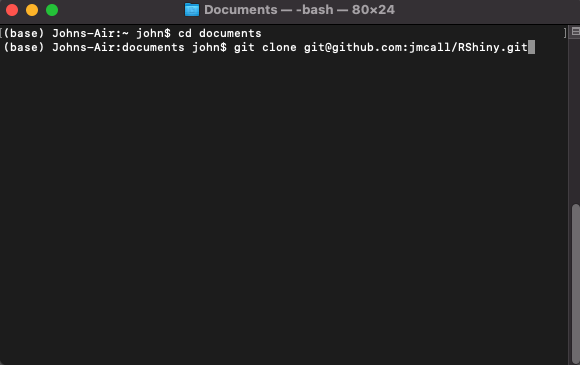
Open a new terminal window and navigate to the folder where you want the repository folder to reside for example in the Documents folder.
Next, we need to clone the GitHub repository onto our local machine, once you are in the folder where you want your project to be stored enter git clone <paste repository link>.
git clone [email protected]:jmcall/RShiny.git
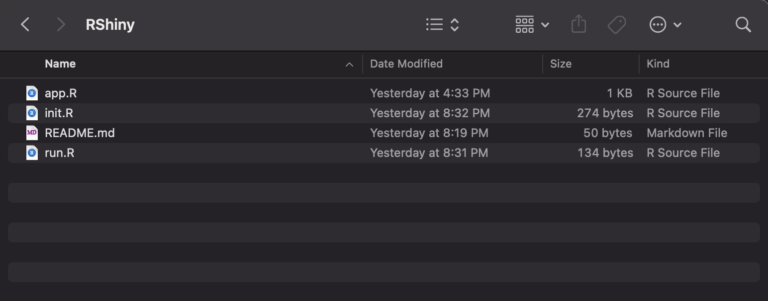
Next copy in the .R files into the project folder
We will need to create two new R files that will allow the application to run on Heroku. The init.R file will have instructions for Heroku to install and load the packages that are used. Copy the code below into an R script file, replacing package_name_1, package_name_2, … etc with the packages your app uses and save the file as init.R in the project folder.
# init.R


#

# Example R code to install packages if not already installed

#

my_packages = c("package_name_1", "package_name_2", ...)

install_if_missing = function(p) {


if (p %in% rownames(installed.packages()) == FALSE) {

 install.packages(p)

 }

}

invisible(sapply(my_packages, install_if_missing))
The run.R file contains some additional instructions that the Shiny app requires to run on Heroku, create a new run.R script file and copy in the code below saving it in the project folder.
# run.R

library(shiny)

port <- Sys.getenv('PORT')

shiny::runApp(

 appDir = getwd(),

 host = '0.0.0.0',

 port = as.numeric(port)

)
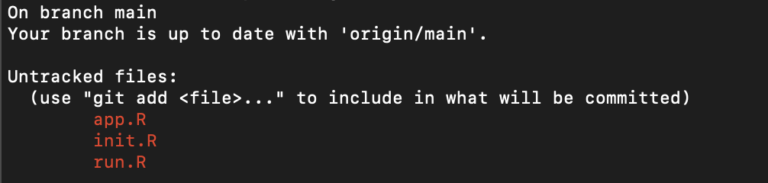
Once these two files are created and added to the project file we need to Add, Commit, and Push these changes to GitHub. Navigate to the project folder in a terminal window and check the status by using the command git status.
git status
Next add the files using the command git add <file name with extension>, we can also use git add –all to avoid typing each file name, when we run git status again the files should turn green, meaning they are ready to be committed and pushed to GitHub.
git add --all
git status

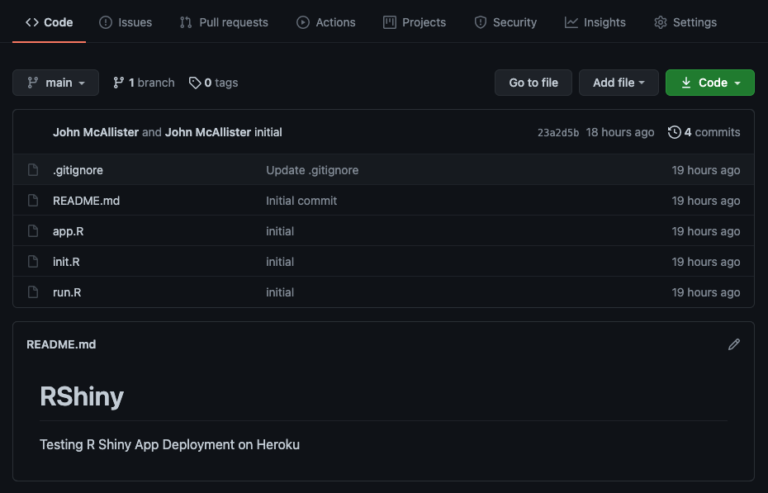
Next run git commit -m “change comments” and git push to push the changes to GitHub, when you refresh your repository on the Github website you should see all of the files that we added in the local repository.
git commit -m “Initial commit for the new test project”
git push
Setup Heroku
The next step is to setup a Heroku app, to accomplish this it will be assumed that users have already setup the Heroku CLI on Mac OS X, detailed instructions can be found here.
Open a terminal window and navigate to the project folder we created in the prior steps by cloning the GitHub repository. enter the command heroku create <App Name> –stack heroku-18. Please note we need to specify stack heroku-18 as the default that would otherwise be created is stack 20 which is not currently compatible with the Heroku Buildpack R we are using.
heroku create r-shiny --stack heroku-18
Next enter the following command:
heroku config:set BUILDPACK_URL=https://github.com/virtualstaticvoid/heroku-buildpack-r.git -a <App Name>
This will install the Heroku Buildpack R for the newly created app.
heroku config:set BUILDPACK_URL=https://github.com/virtualstaticvoid/heroku-buildpack-r.git -a r-shiny
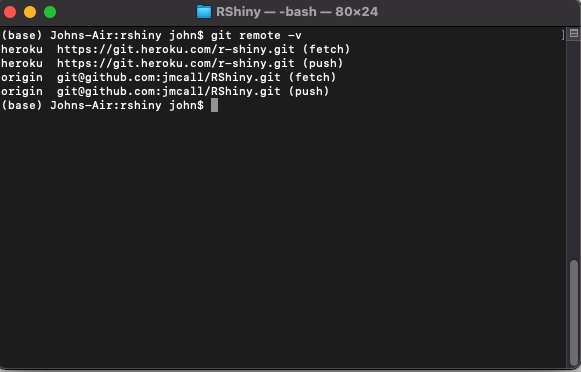
We should now be able to run the command git remote -v and you should see that the Heroku app we just setup is assigned to the GitHub repository we created in the previous steps.
git remote -v
If the wrong Heroku app is assigned or needs to be changed simply navigate to the repository folder and run the command heroku git:remote -a <App Name> to assign the correct app.
heroku git:remote -a r-shiny
The last step is to run the command git push heroku main, this will deploy our GitHub repository to Heroku. The process will take some time, especially if you are deploying a larger application.
git push heroku main
Login to your Heroku account, you should see the new application we just deployed, select it and click Open App in the top right hand corner. If you run into an error a common mistake is that a package that is being call in the application isn’t included in the init.R file. If this is the case simply add it and follow the steps again to push the changes to GitHub and Heroku. The GitHub repository, sample application, and additional references can be found below, please send me a message through the contact form if you run into any issues, hopefully you have found this guide as a useful way to quickly deploy and share R Shiny Applications on Heroku.
